The first basic settings
Before you start your daily work in the system, set up your basic structures. This configuration ensures smooth use within the team and efficient sample management.
For each step, you will find a short YouTube video with detailed instructions displayed directly in the system.
Step 1: Create catalogs
Create the basic catalogs for your sample and aliquot types, cases and box types. These form the basis for your subsequent entries and facilitate standardization.

Mit dem Laden des Videos akzeptieren Sie die Datenschutzerklärung von YouTube.
Mehr erfahren
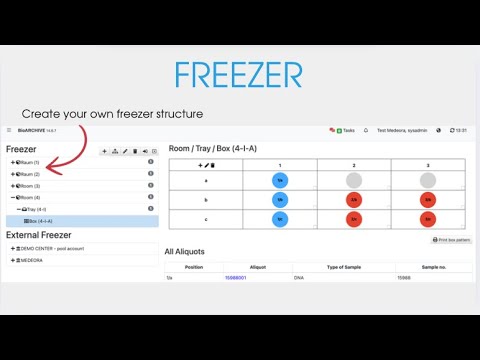
Step 2: Create freezer structure
Create a virtual map of your storage locations – from freezers to shelves to individual boxes. This way, you always know where each sample is located.
Mit dem Laden des Videos akzeptieren Sie die Datenschutzerklärung von YouTube.
Mehr erfahren
Step 3: Define studies
Create your studies and enter the required information. This creates a clear assignment for all subsequent samples and cases.

Mit dem Laden des Videos akzeptieren Sie die Datenschutzerklärung von YouTube.
Mehr erfahren
Step 4: Create cases
Create your first cases and assign them to a study. A case collects all relevant information about a person or investigation.
Step 5: Create samples
Enter samples for a case. You can track and process these precisely later.
Step 6: Import aliquots
Import aliquots and assign them to the previously created samples. After the import, you will see your aliquots directly in the respective storage box – clearly and precisely positioned.

Mit dem Laden des Videos akzeptieren Sie die Datenschutzerklärung von YouTube.
Mehr erfahren
Now you’re ready – get started and start working in the system!
If the videos are not enough: You can find detailed explanations and articles on each of these topics in our knowledge database. Simply search for the desired topic – and you will find step-by-step help, examples and further information.