Storage location / Freezer
Freezer – structure and manage storage locations easily
With the Freezer module, you can manage your freezers, boxes and aliquot types clearly and flexibly. These instructions will guide you step by step through the setup of your storage system – for efficient sample management across the entire team.
Step-by-step guide to configuring your freezer
1. access to the freezer management
-
Open the “Samples” tab in the main menu.
-
Select the “Storage location” item in the lower menu.
-
On the left-hand side you will see an overview of all available freezers.
2. define box and aliquot types
-
In the catalogs, you define which box types and aliquot types are used in your warehouse.
-
Under “Matching boxes” you will see a list of all available box types.
-
Assign the appropriate box types to the respective aliquot types to ensure correct storage.
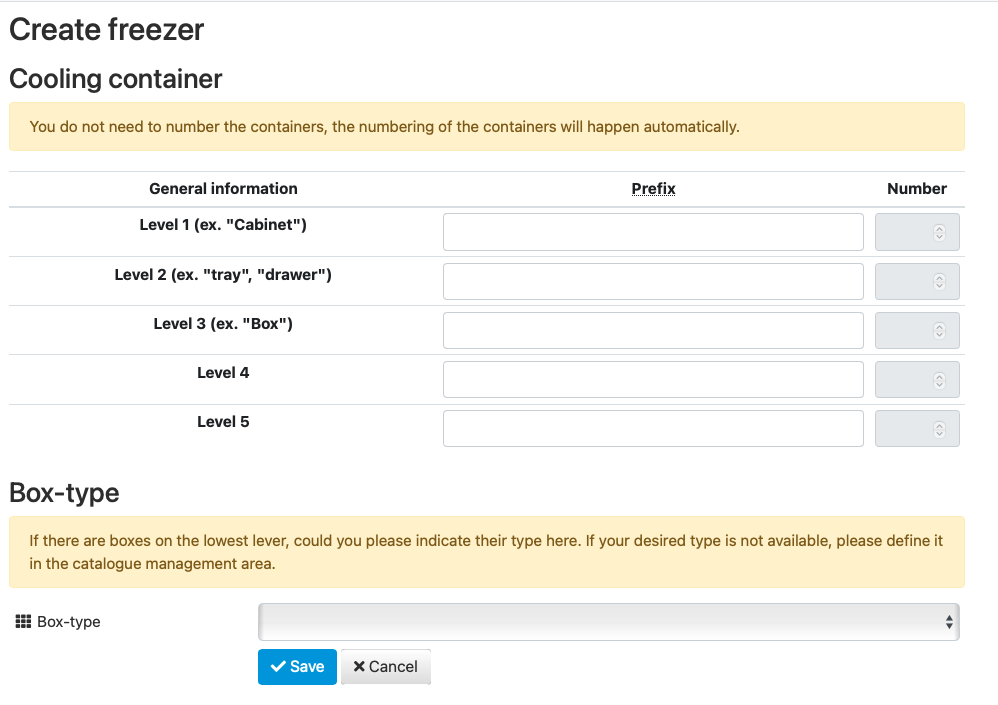
3. create freezer structure
-
The freezer system is divided into up to 5 levels (e.g. freezer → compartment → level → box).
-
You can add, edit or delete new structures on each level.
-
Boxes can be easily moved to make optimum use of the space.
4. graphic overview and information
-
The contents of your freezers are displayed graphically.
-
If you move the mouse pointer over a sample, important information such as sample type, fill level or storage location is displayed.

5. save changes
-
After configuration, click on “Save” to save your entries.
-
After saving, you will see your structure in the left-hand column. Click on “+” or double-click to open further levels.
6. edit freezer
-
You can use the toolbar at the top of the screen to make further settings, adjust details or add new layers.
![]()
Watch our short video on freezer management – where we show you step by step how to set up and manage your storage system efficiently.
You are currently viewing a placeholder content from YouTube. To access the actual content, click the button below. Please note that doing so will share data with third-party providers.